Note
Some of the features described below are only available in the Professional release
This page is where all the configuration fine-tuning of the firewall takes place. By default, only very basic features are enabled during installation. You will have to enable more advanced features manually. Once you are content with your options click on to save the changes and return to the WAF panel page, or to return without saving.
Important
If you do something wrong and you inadvertently lock yourself out of the administrator area of your site, do not panic! Read this page about regaining entrance.
The Configure WAF page is split into several tabs (or option groups, if you enabled the Long Configure WAF Page parameter in the component's Options page) to make it easier for you to locate the correct option. The documentation of this page is organized as one section per tab to help you locate the option you are looking for.
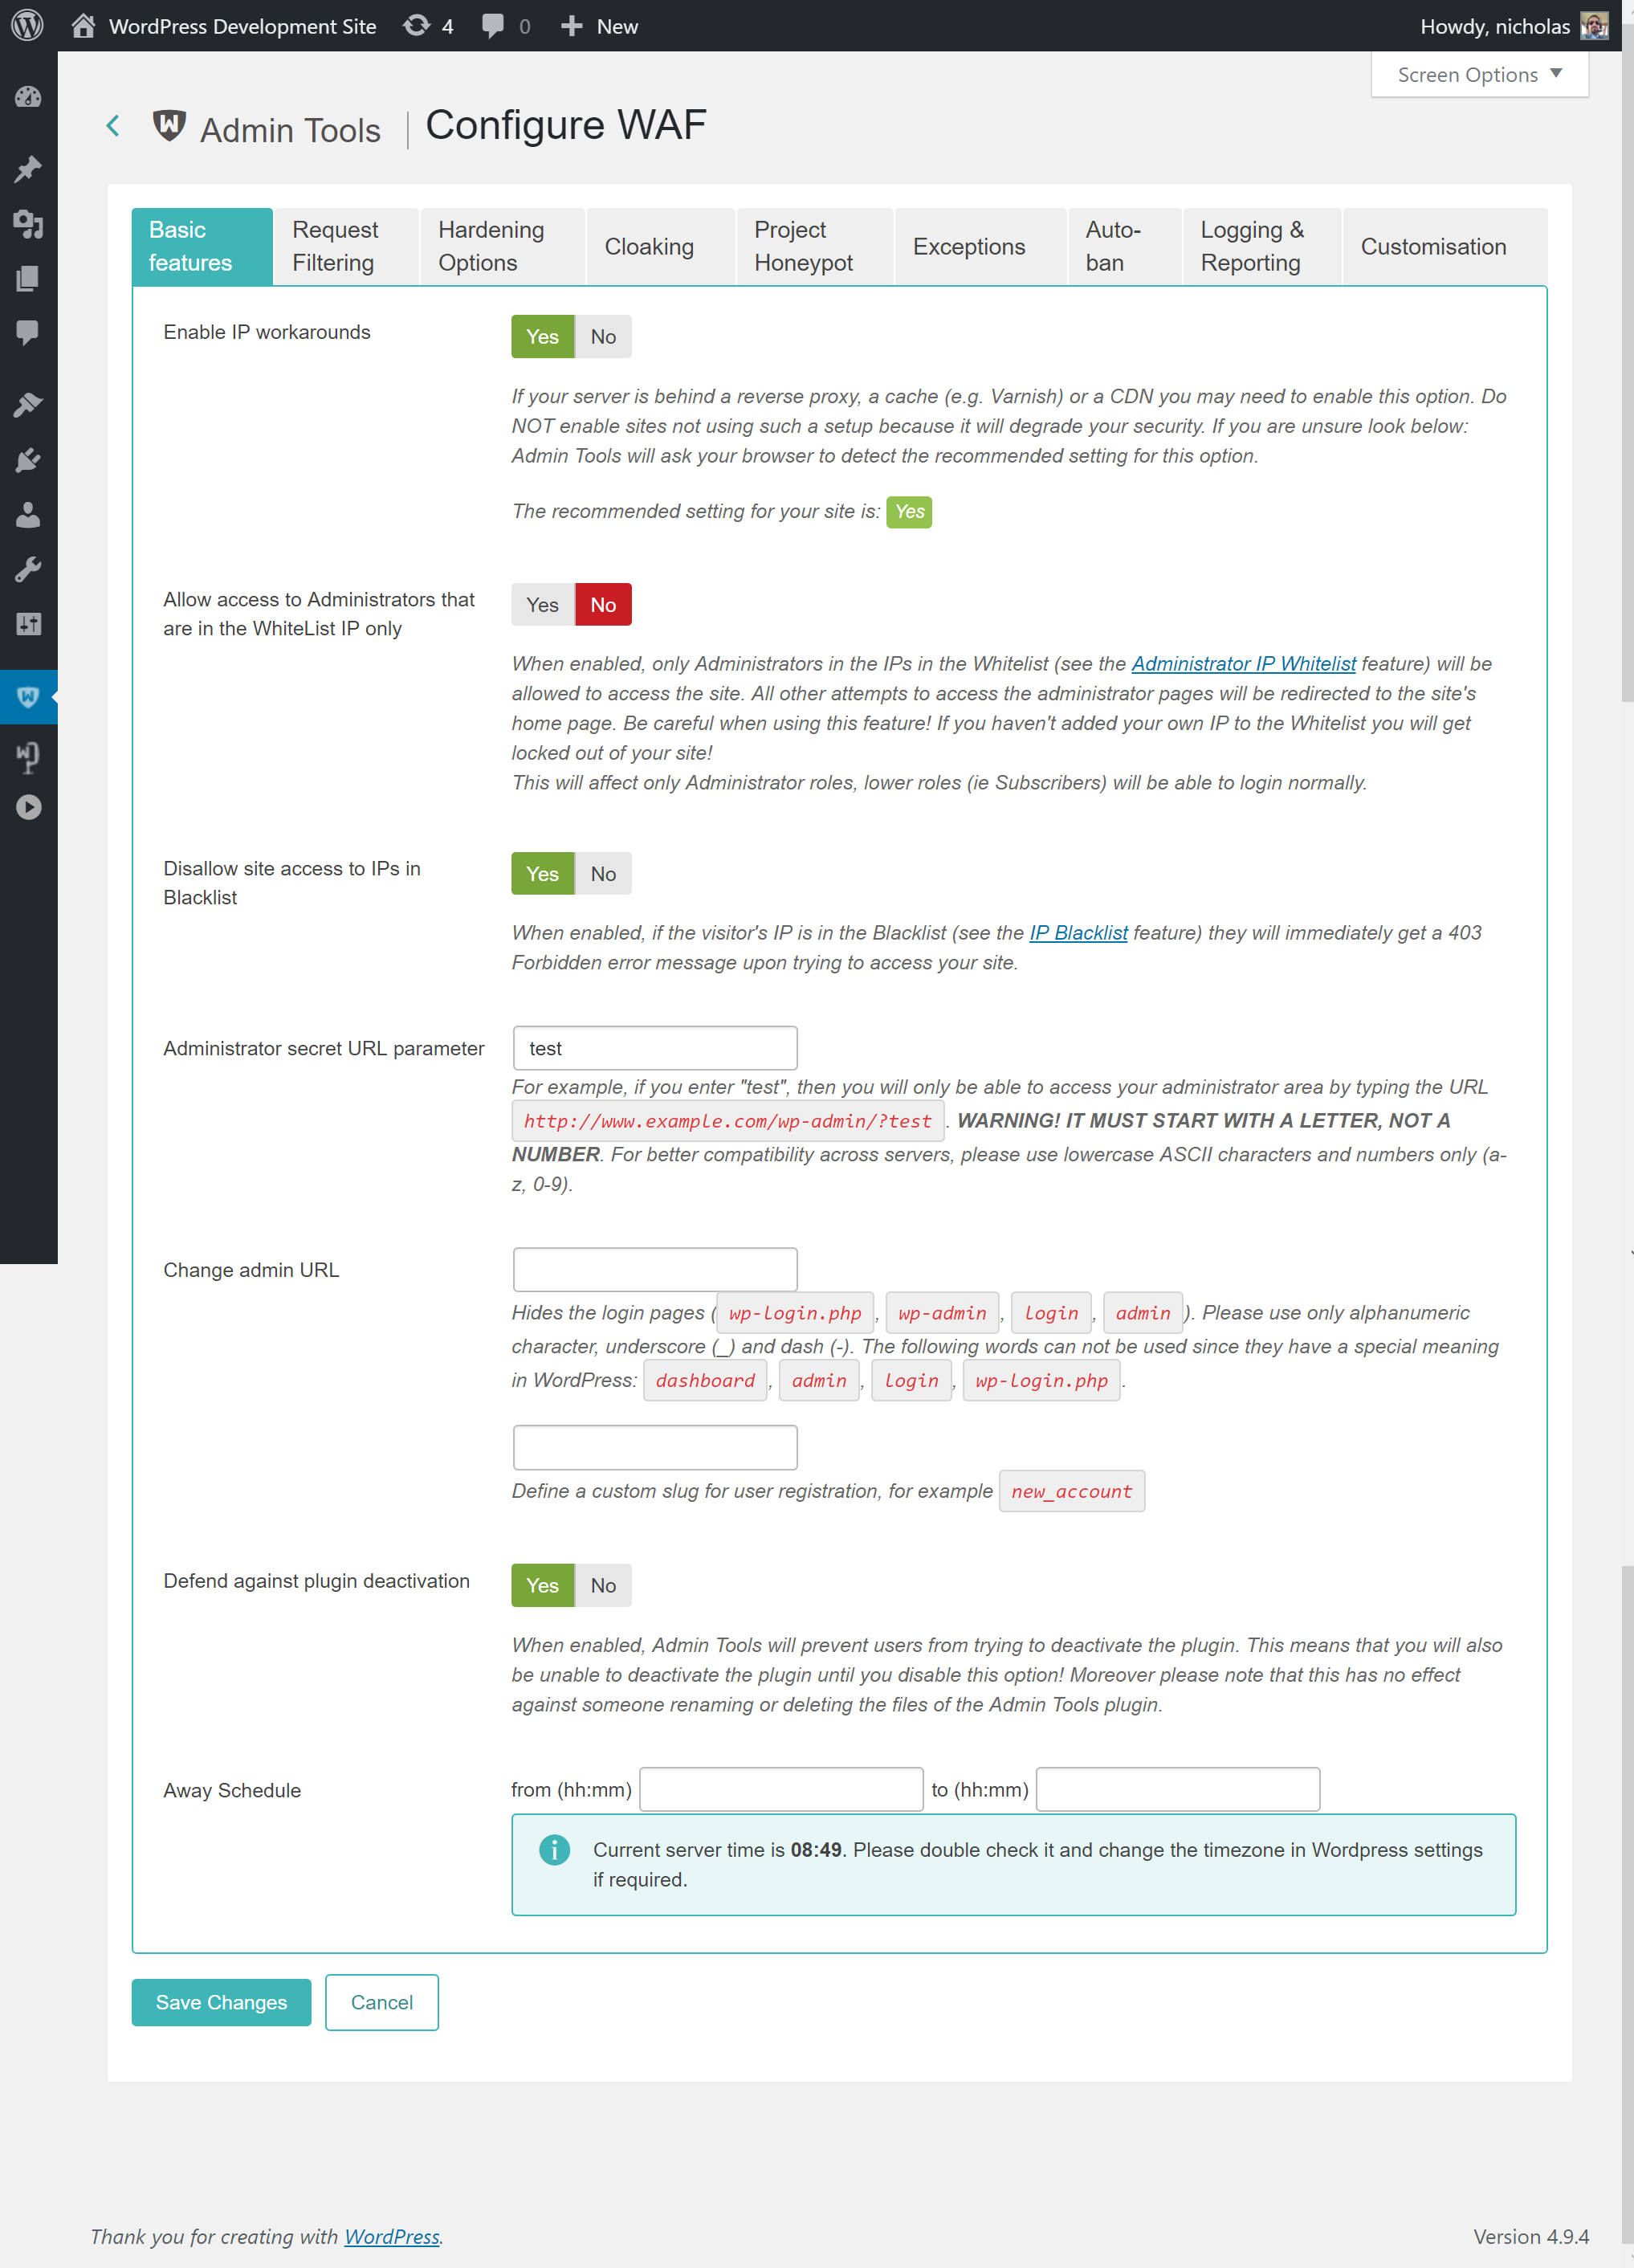 |
The Basic Protection Features section contains the very basic options which allow you to control who can access your site.
- Enable IP workarounds
When this option is disabled (default on new installations) Admin Tools will get the visitor's IP only from the REMOTE_ADDR environment variable sent by your server to PHP. This is the most secure option but may cause a problem on certain sites which have a load balancer, reverse proxy, cache or CDN in front of the web server. In these cases the REMOTE_ADDR contains the IP address of the load balancer, reverse proxy, cache or CDN in front of the web server, NOT the IP address of the visitor. As a result all attacks will appear to be coming from the same IP address. Automatically or manually blocking this IP will disable your site for everyone. Moreover, features like IP whitelist, IP blacklist and so on will not work properly or at all.
On these setups Admin Tools you can set the Enable IP Workarounds option to Yes. This way Admin Tools can use the X-Forwarded-For HTTP header which is sent by the load balancer, reverse proxy, cache or CDN in front of the web server instead of REMOTE_ADDR. This HTTP header contains the real IP address of the visitor and Admin Tools' IP-based features will work properly.
This option must NOT be enabled on sites which are not behind a load balancer, reverse proxy, cache or CDN. If you do that then an attacker can send a X-Forwarded-For HTTP header to mask their IP address or perform a targeted denial of service attack.
If you are unsure about your setup there is a failsafe ways to figure out if you need to enable this feature. First, set it to No. Then wait until there is an attack on your site. Did your site become inaccessible for everyone after the last time Admin Tools detected an attack? Do you always see the same IP or variations of the same in the Blocked Requests Log? If the answer to both questions is "yes" then you must set the "Enable IP workarounds" option to Yes.
- Allow administrator access only to IPs in Whitelist
When enabled, only IPs in the Whitelist (see the following sections of this documentation about configuring it) will be allowed to access the administrator area of the site. All other attempts to access the administrator pages will be redirected to the site's home page. Be careful when using this feature! If you haven't added your own IP to the Whitelist you will get locked out of your administrator area!
Please look into the IP Whitelist documentation section for more information.
Important
IPs added to the administrator IP whitelist are fully white-listed as far as Admin Tools is concerned. This means that no security measure will be applied against them. Please place only very well trusted IPs in this list! If an attack is launched from this IP, it will not be blocked by Admin Tools!
- Disallow site access to IPs in Blacklist
When enabled, if the visitor's IP is in the Blacklist (see the following sections of this documentation about configuring it) they will immediately get a 403 Forbidden error message upon trying to access your site.
We recommend that you do not routinely add IPs which get automatically blocked to the Blacklist. Let Admin Tools manage IP blocking. Attackers usually employ dynamically assigned IPs which change over time or use compromised third party computers to launch their attacks from for a limited amount of time. If you blacklist these IPs you may end up permanently blacklisting legitimate traffic by accident, when these IPs are assigned to a different person. Likewise, if someone gets blocked by accident and you blacklist their IP you are actually blocking a legitimate user from your site. Admin Tools is very capable of managing IP blocking automatically, with a rolling time window, making it harder for attackers to attack your site while making sure that legitimate visitors are unlikely to be permanently banned by accident.
- Administrator secret URL parameter
Normally, you can access your site's administrator area using a URL similar to
http://www.example.com/wp-admin. Potential hackers already know that and will try to access your site's administrator area the same way. From that point they can try to brute force their way in (guess your username and password) or simply use the fact that a WordPress administrator area exists to deduce that your site is running WordPress and attack it using WordPress-specific attacks. Whatever you enter here you are required to include as a URL parameter in order to access your administrator area. For instance, if you enter the word test here you will only be able to access your site's administrator area with a URL similar tohttp://www.example.com/administrator?test. All other attempts to access the administrator area will be redirected to the site's home page, or blocked – depending on the setting of the Invalid administrator secret URL parameter action parameter. If you do not wish to use this feature, leave this field blank.Important
The secret URL parameter must start with a letter. If it starts with a number, you will immediately get a "Illegal variable _files or _env or _get or _post or _cookie or _server or _session or globals passed to script" error when trying to access your site's administrator back-end. It should also contain only lowercase and uppercase ASCII characters and numbers (a-z, A-Z, 0-9), dashes and underscores in order to ensure the widest compatibility with all possible browser and server combinations.
Any other characters you use (such as: punctuation; special characters; Latin letters with accents or diacritics; Greek, Cyrillic, Chinese, Japanese and other ethnic script characters)will have to be URL-encoded. This makes it difficult and tricky to use, hence our recommendation not to use it.
Moreover note that some extended Unicode characters such as certain Traditional Chinese characters and Emoji cannot be used. They will be either rejected by the server or trigger a server protection which will lock you out from your site at the hosting level (you'll have to contact your host to unblock you).
Finally note that on most servers this is case sensitive, i.e. abc, ABC and Abc are three different secret words.
Tip
Some servers do not work when trying to access the protected administration area of your site with a URL in the format
http://www.example.com/wp-admin?test(where http://www.example.com is the URL to your site and test is your administrator secret URL parameter) due to their configuration. You may want to try usinghttp://www.example.com/wp-admin/?test(add a slash right before the question mark) orhttp://www.example.com/wp-admin/index.php?test(add /index.php right before the question mark). One of them is bound to work on your server. Unfortunately, there is no way to know which ones will work on your server except for trying them out. The first format (http://www.example.com/wp-admin?test) works on 95% of servers and that's what we recommend trying out first.- Invalid administrator secret URL parameter action
Choose the action to take if an attempt was made to access the administrator without a valid secret URL parameter. The default action is
Redirectwhich redirects the user to the frontend of the site. The other option isBlockwhich will instead show the blocked request message, and stop execution.In both cases a blocked request is logged for the user's IP address. This option does not affect whether a blocked request log entry will be created; it only affects what happens after the blocked request entry is created. Most people prefer the subtle "maybe you shouldn't be here" subtext of redirecting to the site's frontend. Some people want to be more affirmative with a message that notifies the other end they are caught doing something they shouldn't. That's all there is to this option.
- Change admin URL
As explained in the option above, you can normally access your site's administrator area using a URL similar to
http://www.example.com/wp-adminwhich is known to hackers with potentially negative consequences. This Admin Tools feature allows you to "cloak" the administrator login URL.It's easier to explain this with an example. Let's say you use the setting
cupcakein this Admin Tools option. When someone who is not already logged in to the administrator back-end tries to accesshttp://www.example.com/wp-adminthey will be redirected to the home page of your site and a security exception will be logged. When they try to accesshttp://www.example.com/cupcakethey will see the WordPress administration login page.A few important notices regarding this feature:
WordPress allows you to log into your site from its public area. If you are already logged into the public area as a user with a role that allows access to wp-admin you will be able to access your site's administration area as wp-admin. This is not a bug, it is by design and makes perfect sense. The objective of this feature is to cloak the administration login page. Once you are logged in with a user with an administrative role you have access to the administration area by definition.
It REQUIRES a server setup which can use permalinks without index.php in them. Typically this means an Apache or LiteSpeed server which can understand .htaccess files. Alternatively, it can be an NginX, IIS, etc server as long as you have configured it properly per the instructions in the WordPress Codex for your particular server technology.
You MUST NOT have any page or other route which is the same as or a subset of what you enter in this option. If you do you will lose access to that page / route the public area of your site.
By using this option you are NOT renaming the wp-admin directory on the server. Doing so is not supported by WordPress and would break your site. This feature is a URL manipulation trick, a sort of smoke and mirrors to confuse hackers trying to brute force your administrator login. Even though it's a trick it is a very effective one!
You CAN combine it with the Administrator secret URL parameter feature. In this case you need to access the login page as something like
http://www.example.com/cupcake?testwhere "cupcake" is the setting of Change administrator login directory to and "test" is the setting of Administrator secret URL parameter.Unlike using the Administrator secret URL parameter on its own you MUST NOT put a slash or /index.php before the question mark even if your server required it before enabling the change administrator login directory option. Remember that what you are accessing is not a real directory on your server, it is merely a URL manipulation trick.
You CAN combine it with the Password-protect Administrator feature (assuming that you are using Apache or another server compatible with .htaccess and .htpasswd files). In fact, it is recommended.
- Change registration URL
Defines a custom slug for the user registration page. For example, entering
new_accounthere will make your site's registration page available athttp://www.example.com/new_accountinstead of the default registration URL. Leave this field blank to keep the default registration URL.This option works in conjunction with the Change admin URL feature above. When the admin URL is customised, you should also set this option so that the registration link works correctly under the new URL scheme.
- Defend against plugin deactivation
Enabling this option will prevent any other Administrator / Super Administrator user from deactivating the Admin Tools plugin in WordPress' Plugins page. Use it in conjunction with the Master Password feature to avoid having other administrators of the site disable Admin Tools either on accident or on purpose.
Important
If you need to disable the Admin Tools plugin you must first disable this feature in the Configure WAF page and save your changes.
- Away Schedule
By default, WordPress allows users with back-end access to log in to the site any time of the day. On smaller sites which have only a handful, or even just one, administrators on the same zone this means that someone can try to log in with a stolen username / password while you are fast asleep and unable to respond to the unexpected login. This where the Away Schedule comes into play. If a user with a role granting administration privileges tries to log into the public or administration area of your site between the "from" and "to" hour of the day they will be denied login. Moreover, if someone tries to access the administration area's login page during that time they will be redirected to the public area of the site – even if the have used the correct Administrator secret URL parameter.
Please note that this feature does not affect your regular users logging in to the front-end of your site. It only prevents users with a role which allows them to display the administration interface of WordPress.
The From and To time has to to be entered in 24-hour format with trailing zeros, e.g. 09:15 for a quarter past 9 a.m. and 21:30 for half past 9 p.m. The time is entered in your server's timezone which may be different than the timezone you live in. For your convenience, the server's time at the time of the page load (in 24 hour format) is shown to you right below the Away Schedule.