 |
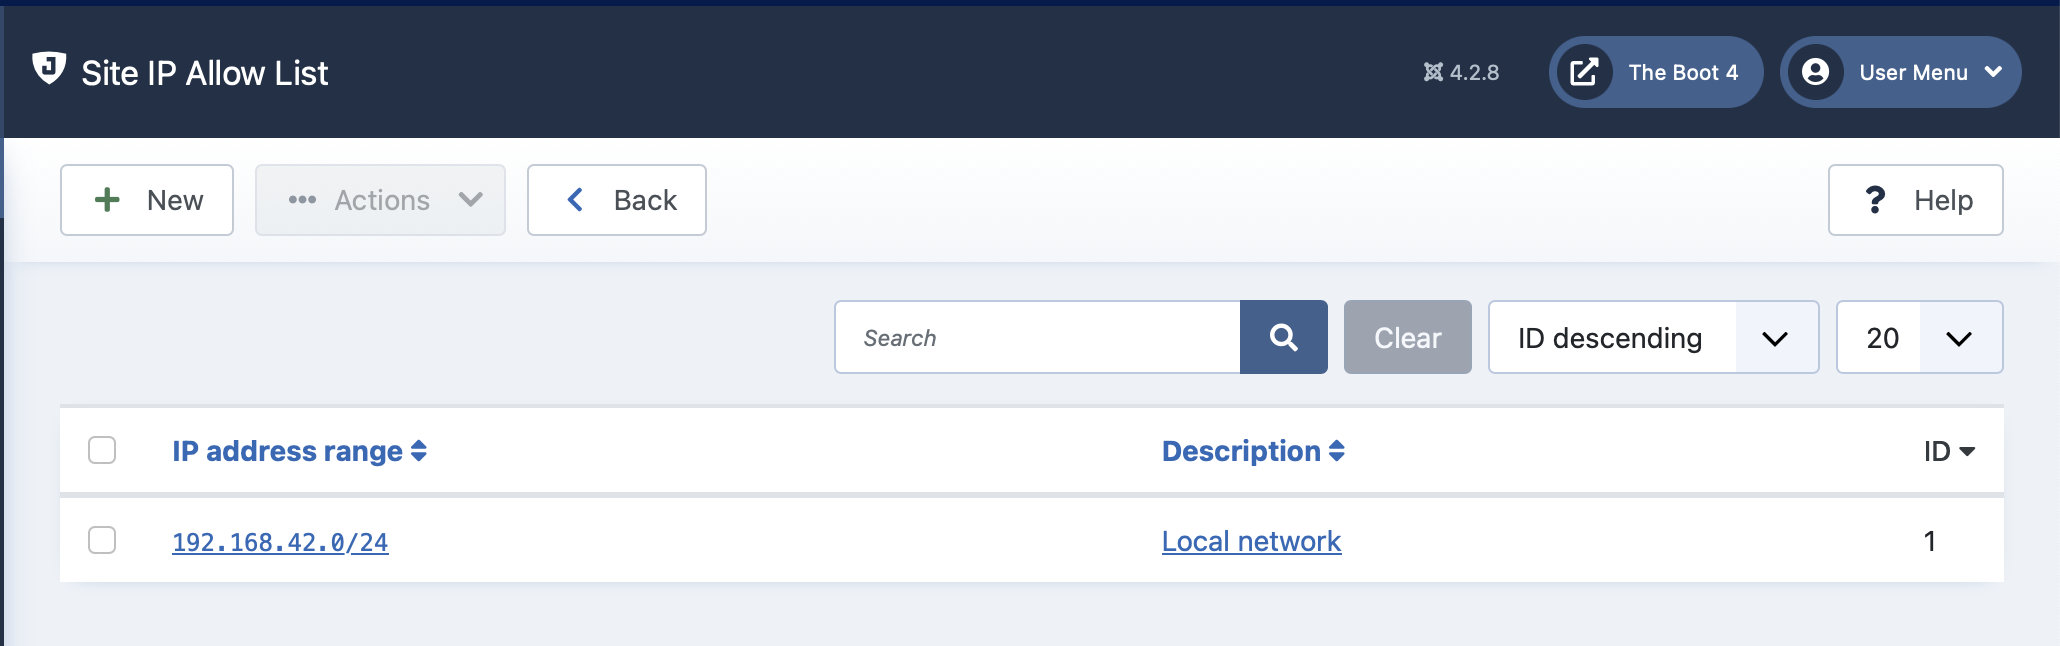
This page allows you to manage the IP Allow List. Any request coming from an IP address in this list will bypass Admin Tools' Web Application Firewall.
Important
Only add IP addresses of explicitly trusted servers, e.g. your payments services provider.
Always remove IP addresses if they are no longer in use for the purpose they were added in the IP Allow List.
DO NOT add the IP addresses of automatically blocked human users in the IP Allow List.
DO NOT add the IP addresses you have already added to the Administrator Exclusive Allow IP List (if you are using that feature). These IP addresses bypass Admin Tools' Web Application Firewall anyway.
This list DOES NOT control who gets blocked by the server configuration file created by the .htaccess Maker, Web.Config Maker, Nginx Conf Maker, or Administrator Directory Password Protection features. This feature only controls how Admin Tools' Web Application Firewall feature works.
An IP address which is in both the Site IP Allow List and the Site IP Disallow List will be blocked. Admin Tools' Web Application Firewall follow the Joomla paradigm of “Deny overrides Allow”. Think of it as so: ‘if I were told to give you a key (allow) and take that very same key away from you (deny) then you would end up with no key’
The management is done using the standard Joomla! toolbar buttons. Clicking on an entry, or checking its box and clicking on will allow you to edit the entry. Clicking on the button allows you to add an IP/IP range. Checking one or several items in the list and clicking on will remove them from the list.
Do not overdo it with allowing IP addresses!
Though counter-intuitive, you should not put the addresses of automatically blocked IP addresses of human users in the IP Allow List when you unblock their IP address. These IP addresses are most always dynamically assigned by their Internet Service Provider and will be reassigned to a different user within a few minutes to weeks. When that happens, you will have a gaping hole in your site's defences as you are allowing a random person to make requests to your site which are NOT blocked by Admin Tools!
This feature is only really meant to be used to explicitly allow well-known, vetted services which cannot possibly send a malicious request to your site such as but not limited to:
Payment service providers
Single sign-on services
Site management services such as Watchful, BackupMonkey, etc
It is NOT meant to be used with third party services which might be manipulated to send a malicious request, or deliberately send malicious-looking requests, such as social media (Facebook, Twitter, Reddit, …), search engines, site crawlers, site security scanners (e.g. Sucuri), CDNs (e.g. CloudFlare), transparent proxies, load balancers, or other sites which are not under your absolute control. You should add these IP addresses to the Never Block These IPs field of the Configure WAF page. Unlike the Site IP Allow List, the Never Block These IPs list will still block malicious requests but will NOT log the malicious request and will NOT block the IP address the request comes from temporarily or permanently.
Finally, there's the performance aspect of the Site IP Allow List. Every time someone connects to your site, on every single page load, Admin Tools has to check their IP address against each and every entry of the allow list. Every entry of the allow list adds a bit of processing time on every page load. In most cases 50 to 100 allowed IPs / IP-ranges will not have a severe impact on your page loading speed. Anything above that threshold has a measurable impact on your site's performance. Your site loads slower for everybody. Search engines pick that up and penalize your slow site by burying it dozens of spots lower in search rankings.
On most sites this should not be a problem; you will need anywhere from none to 20 entries according to our experience.
Using the Site IP Allow List
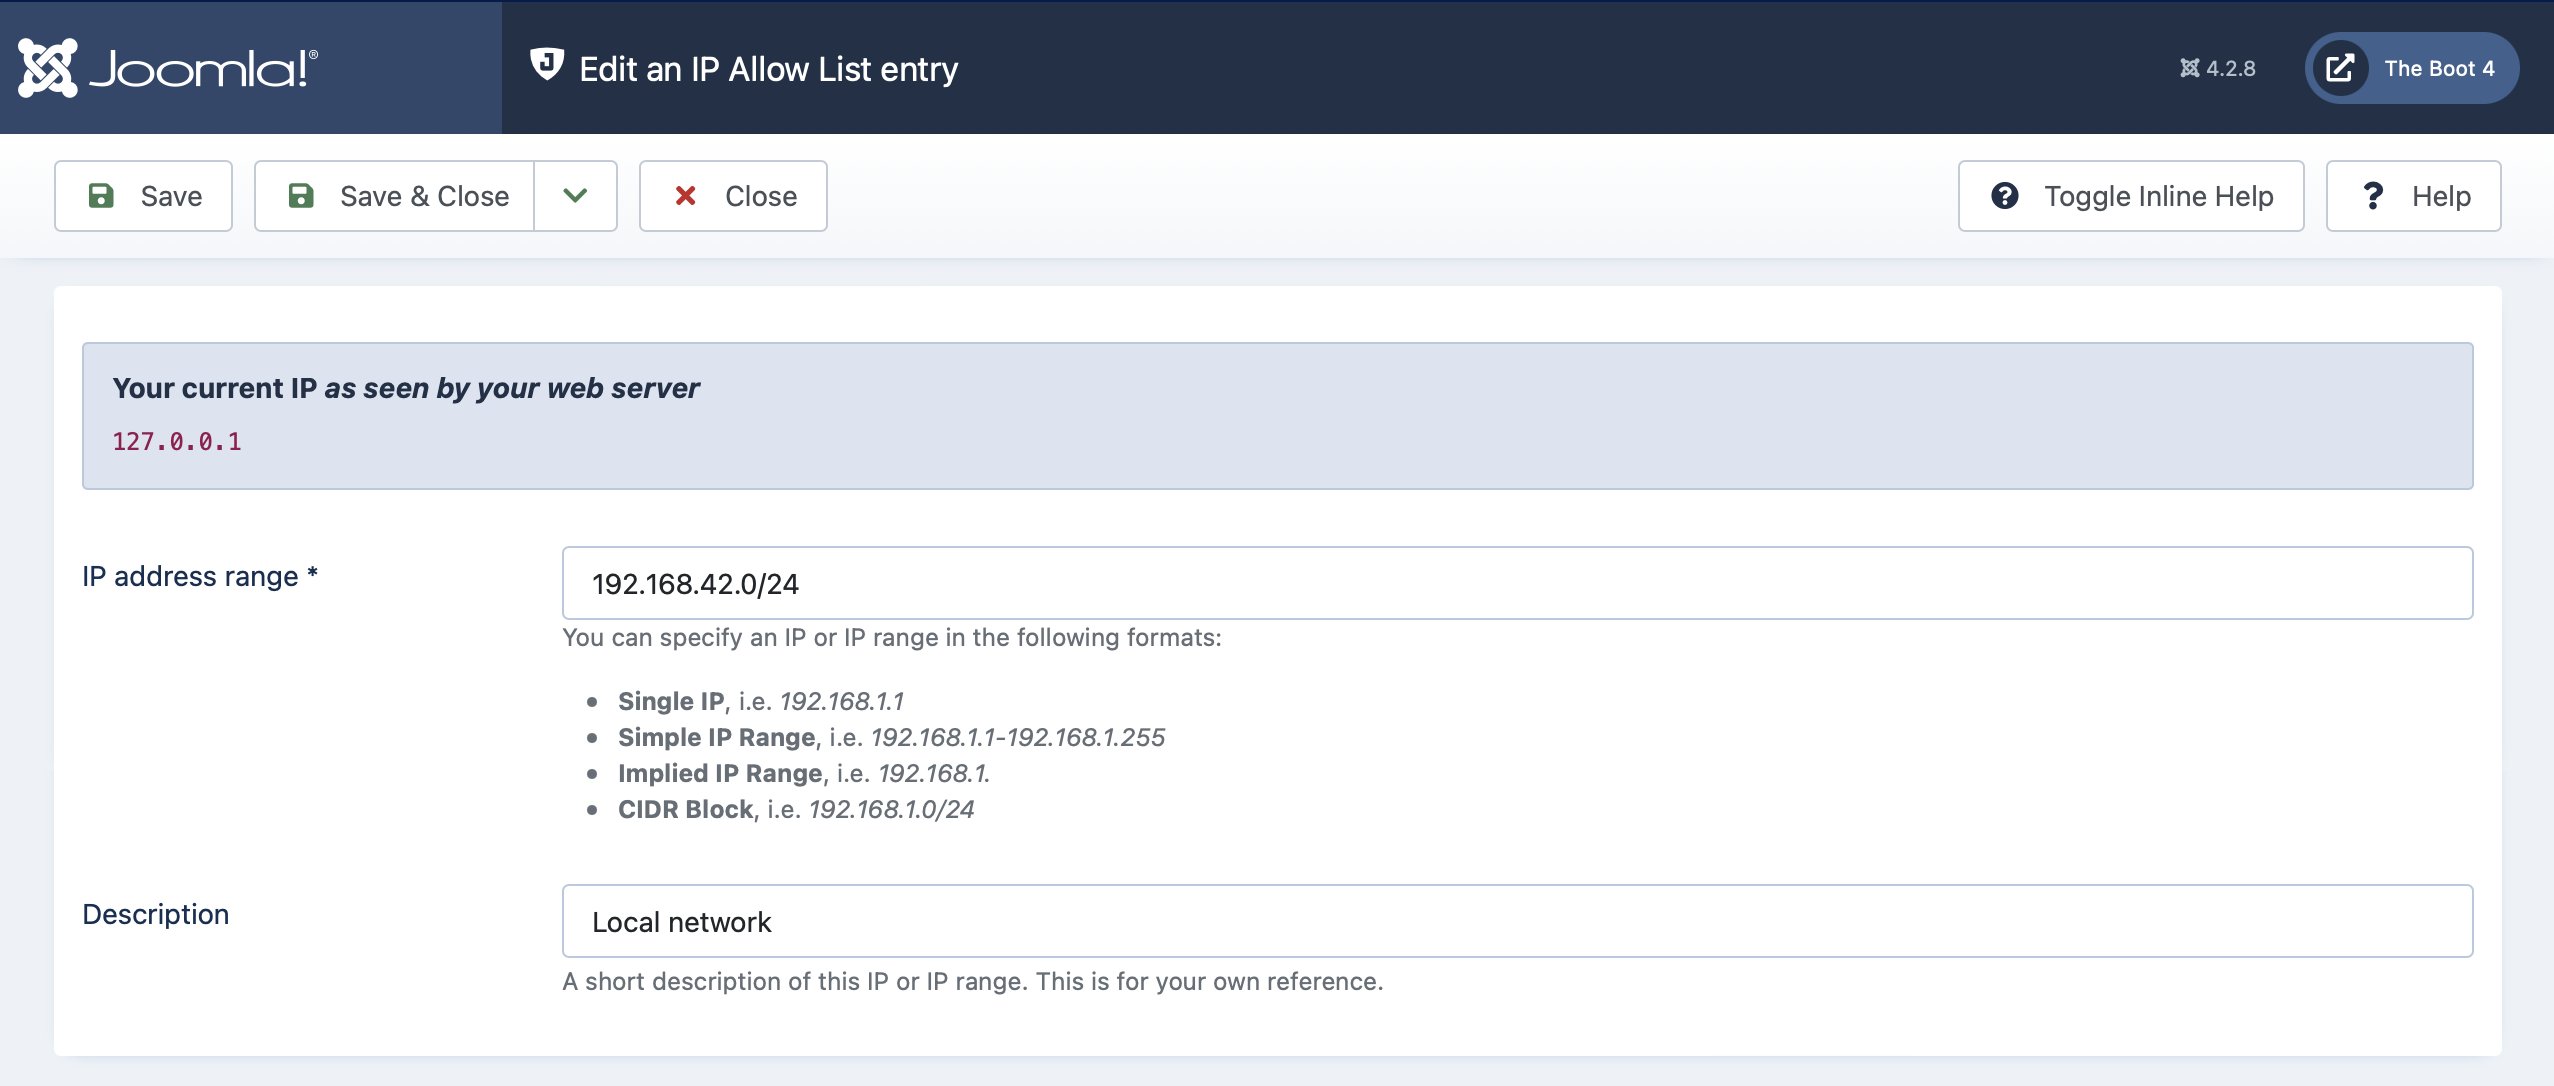
The Edit/Add page looks like this:
 |
Tip
You current IP address is displayed right above the edit box.
If you see a private network address you should go to System, Global Configuration, Server and set Behind Load Balancer to Yes. If the problem persists after this configuration setting, please talk to your host; it means that there is a misconfiguration on their server which does not allow PHP and by extent Joomla and Admin Tools to “see” the real IP address of the site's visitors, making the Web Application Firewall misbehave and accidentally block everybody from your site.
In the IP Address Range box you can enter an IP or IP range in one of the following ways:
A single IP, e.g. 192.168.1.1
A human readable block of IPs, e.g. 192.168.1.1-192.168.1.10
An implied IP range, e.g. 192.168.1. for all IPs between 192.168.1.1 and 192.168.1.255, or 192.168. for all IPs between 192.168.0.1 through 192.168.255.255.
A CIDR block, e.g. 192.168.1.1/8. If you don't know what this is, forget about it as you don't need it.
A Subnet Mask notation, e.g. 192.168.1.1/255.255.255.0
Do note that Admin Tools supports IPv4 and IPv6 (if your server supports IPv6).
Tip
You can use the Save & New to quickly add multiple entries without having to go back to the administration page and click on New all the time.