SocialMagick composites the image by combining items on top of each other. The available items used in compositing are:
Colour. The entire layer is filled with a solid or semi-transparent colour. You can select its opacity, from 0 (fully transparent, i.e. does not show up) to 100 (fully opaque). This colour can only be defined in the template; it cannot be overridden.
Base Image. An optional static image. You can use it to apply frames and branding to your template. This image can only be defined in the template; it cannot be overridden.
Extra Image. An optional image which may come from the content (intro image, full article image, category image, …), a Joomla Field (a.k.a. Custom Field), or a static image you select. This image can be overridden in more specific option levels.
Text. Optional text which may come from the content (article title, category title, …), or static text you enter. This text can be overridden in more specific option levels.
Note
The Base Image and Extra Image can be any graphics format supported by your PHP image library. Typically, files in the PNG, JPG, GIF, and BMP formats are safe to use. Most servers do support WebP images, as well as some other lesser known formats you are unlikely to be using on your site such as TIFF, XCF, and so on.
Do not use animated images. In most cases only the first frame will be used. In some extreme cases, you might get an error, thus no image generated.
SVG files are supported only by the imagick extension; the gd extension does not support them at all. Moreover, SVGs are rendered in the image size they claim to be; they are not scaled up or down to the template size. This can cause a lot of display artifacts. As a result, we recommend converting your SVGs to PNG or WebP images at a size suitable for your template size.
The items are layered on top of each other. If you have ever used a graphics application, you will immediately recognise that it is exactly how all non-trivial graphics applications work. If you are new to this concept, you can think of it like printing on transparency film, and layering the transparencies on top of each other, then looking through from the bottom to the top of the transparencies stack. The layers stack looks like this:
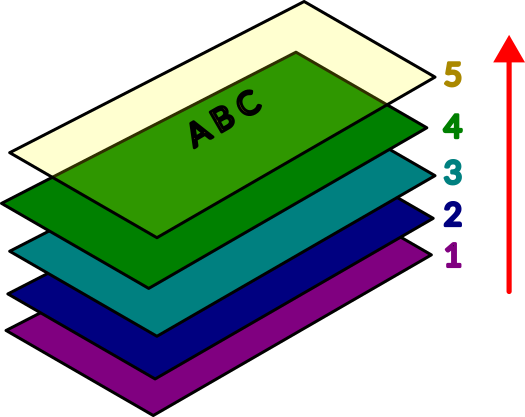
The bottommost layer (1) is the Underlay layer. The Extra Image will be placed here the Display Layer option is set to Underlay.
The second layer from the bottom (2) is the Colour layer. This is where the Colour is applied to. If you do not want to use this layer, set the Background Colour Opacity option to 0 (all the way to the left).
The middle layer (3) is the Base Image layer. This is where the Base Image is placed.
The fourth layer (4) is the Overlay layer. The Extra Image will be placed here the Display Layer option is set to Overlay.
The topmost layer (5) is the Text layer. This is where the Text will be rendered.
SocialMagick comes with a number of predefined templates which show you a lot of practical use cases. Feel free to copy and customise them. Use the Template Preview feature to understand the effects of your changes.
Beyond that, here are some further examples we have used on production sites.
Colourise The Extra Image
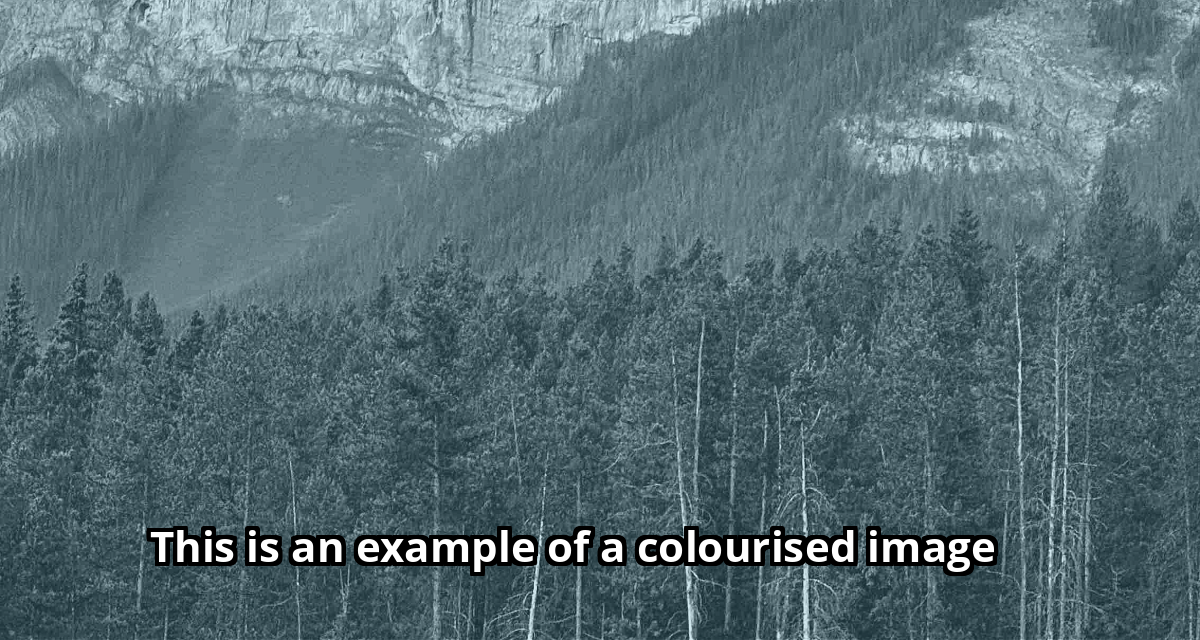
Concept: The brand uses colourful images for its posts. For social sharing they wanted to mute the palette to the main brand colour to draw attention to the page title. Please note that what you see in the example image is not the brand's font, the correct font size, and text positioning used on the live site. We deliberately altered it to make the colourisation effect more pronounced.
Implementation: To colourise the extra image we need to convert it to grayscale, and layer a semi-transparent colour layer on top of it.
Base background colour: #5cb0c9
Background colour opacity: 27
Extra Image, Grayscale: 100
Framing / Branding Without A Colour Background

Concept: This blog site is using big, colourful images for each post. For social sharing we want to surround them with a branded frame which has a "banner" area where we overlay the article's title.
Implementation: Put the Extra Image in the background, overlaying a Base Image.
Background colour opacity: 0
Base image: we used a PNG image which has the frame elements
Extra Image, Display Layer: Underlay