This is accessible through the back-end , , menu item.
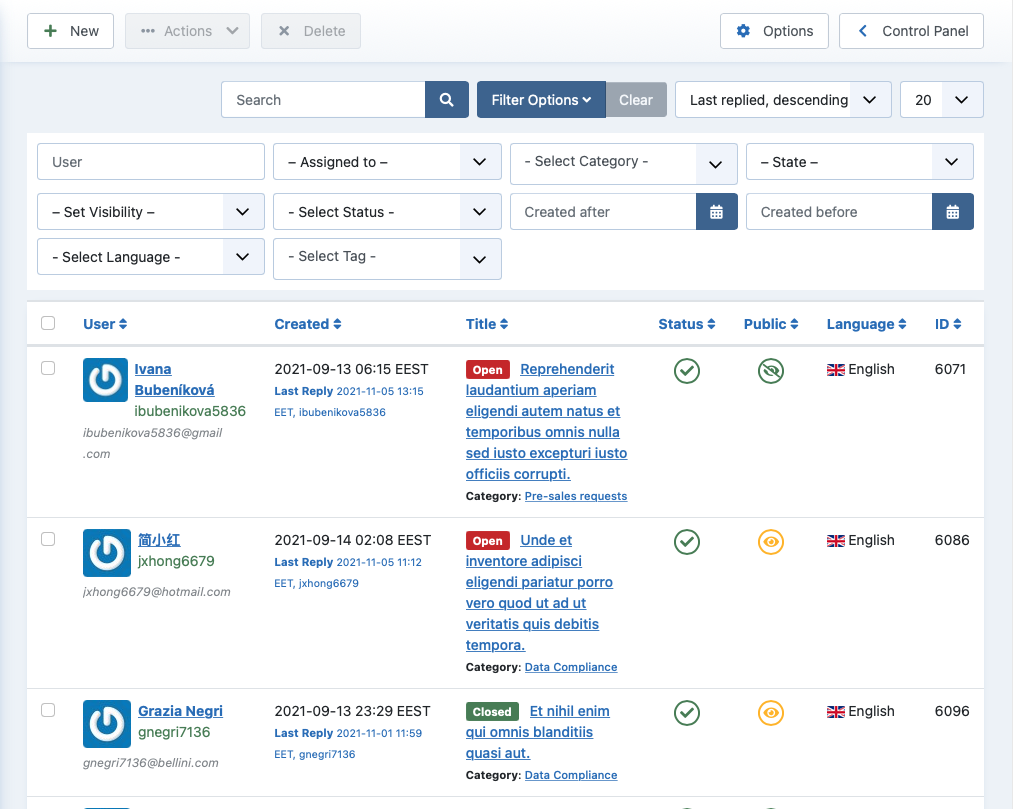 |
This is the most important page in Akeeba Ticket System. This is where you can review, manage and reply to your tickets from your site's backend.
Please note that you can still manage tickets from the site's frontend. The backend offers more filtering and convenience options than the frontend.
The fields you see on each ticket are:
- User
Who submitted the ticket. You can see their name, username, email address and user profile image (avatar). The avatar has a fallback to Gravatar which is why you may see some profile pictures even though you don't have a profile image field in the user profile.
- Created
The date when the ticket was created. The date and time is shown in the timezone you have selected in your backup profile or, if non was selected there, in the Server Timezone defined in your site's Global Configuration. The abbreviation of the timezone is displayed at the end. In the screenshot above, EEST stands for Eastern Europe Standard Time, the timezone of the Republic of Cyprus where our company is located in.
Below that you will see the Last Reply line which displays the date, time and username who last replied to the ticket.
- Title
The title of the ticket.
Before the ticket title you will see a sort label with the state of the ticket: Open, Pending, Closed or any of the custom statuses. Open tickets are those last replied to by the client, awaiting for a Support Staff reply. Pending tickets are those last replied to by a member of the support staff, awaiting a reply from the client.
Below the title there's the Category line displaying the category the ticket belongs to. The name of the category is a link which open the category for editing.
If a ticket is assigned to a member of the support staff you will see the Assigned To line displaying the full name and username of the user the ticket is assigned to. The ticket assignment is for your internal use; the clients do not see it. It allows your support staff to know who's working on which ticket.
- Status
Whether the ticket is published or not. Unpublished tickets will not appear in the frontend of the site for anyone but support staff. Clicking on the icon allows you to toggle between the two ticket states.
- Public
Whether the ticket is public or not. Clicking on the icon allows you to toggle between private and public.
- Language
This column only appears if your site is using Joomla's “Multi–language” feature. It shows you the language of the category the ticket is created in.
- ID
The numeric ticket ID. This is the unique identifier of every ticket and is always shown in the component's front-end.
The toolbar contains the icons which allow you to manage your tickets (some icons are under the Actions drop–down menu):
- New
You can create a new ticket — typically on behalf of a user — by clicking on this button.
- Publish
Set the selected tickets' Status to Published. They will be visible in the component's front-end.
- Unpublish
Set the selected tickets' Status to Unpublished. They will no longer be visible in the component's front-end.
- Make Private
Makes the selected tickets private.
- Make Public
Makes the selected tickets public.
- Batch
Opens an interface which allows you to make changes across all selected tickets. The following changes are available:
Assign to. Assign the selected tickets to a specific member of the support staff. Please note that ONLY the users who are granted the Support Staff at the component level (the component's Options page) will appear here. If you want to assign a ticket to users who only have the support staff permission for specific categories you will have to do it by editing each ticket individually.
State. Set the ticket state to Open, Pending, Closed or any of the custom ticket states you have created in the component's Options page.
Move to category. Move the selected tickets to a different category. Please note that this may cause custom fields values to be lost if the exact same custom field (as identified by the custom field ID, NOT its name or label!) is not assigned to the new category you are moving the ticket to.
Add tag. Add a tag to the selected tickets. Use ticket tags to organise tickets, e.g to keep track of tickets concerning a common issue. You can filter the tickets list by tag.
- Delete
Completely remove the selected tickets from the database.
Warning
Use with extreme caution! Deleted tickets cannot be restored. There is no "Trash can" feature in Akeeba Ticket System. We strongly recommend unpublishing the ticket instead.
Filters
The filters of the tickets page are mostly self explanatory. There are, however, hidden powers in some of the filters by adding a prefix before your search query e.g. prefix:my search query. Only one prefix can be used at a time.
The Search field supports the following prefixes:
id:Search a ticket by its numeric ID.category:Show all tickets in categories where the category title matches the search query.title:Show all tickets whose title matches the search query.No prefix has the same effect as using the
title:prefix.
The User field supports the following prefixes:
id:Search a user by their numeric ID.username:Search for users whose username matches the search query.name:Search for users whose full name matches the search query.email:Search for users whose email matches the search query.No prefix searches for users whose username, name or email matches the search query.
Click on a ticket's title to view / edit the ticket.
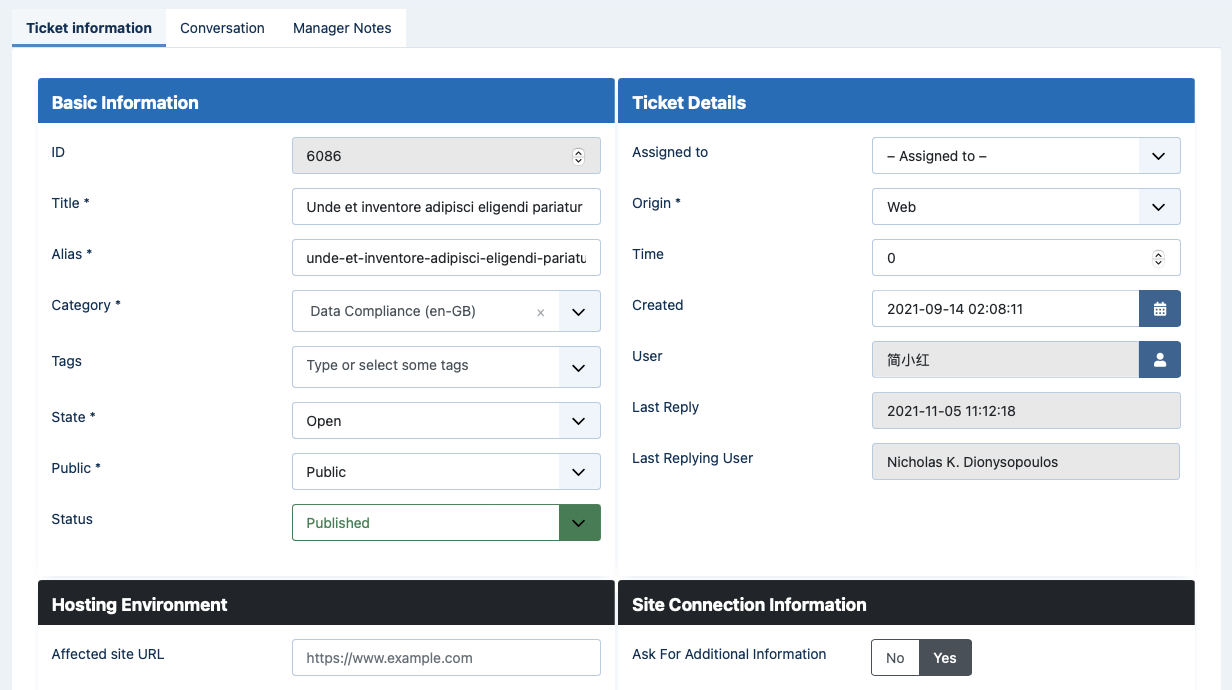 |
The Ticket Information tab has the basic information about the ticket, as well as any ticket custom fields you may have created. The Basic Information and Ticket Details areas are handled by Akeeba Ticket System itself and shown for all tickets. The areas with the dark headers are custom field groups. If there are fields outside a field group they appear in an area with the generic header title Fields.
The Basic Information is:
- ID
The numeric ID of the ticket. You cannot change that, it's created automatically when submitting the ticket.
- Title
The ticket's title, as displayed to the client and the support staff.
- Alias
The ticket's alias is used to construct the URL to the ticket. By default, it's created automatically from the ticket title. If there is a collision with an existing ticket ATS will append a dash and a number.
- Category
Which category the ticket belongs to. Please keep in mind that changing the category may lose custom fields values if the new category does not support the same custom fields (as identified by their numeric ID, NOT their name or label). It may also make it impossible for the assigned user to reply to the ticket if they do not have the Support Staff permission enabled for the new category.
- Tags
Add or remove ticket tags.
- State
Choose the state of the ticket: Open (awaiting for support staff reply), Pending (awaiting for client reply), Closed (the client cannot reply) or any of the custom ticket states you have created in the component's Options.
- Public
Is this ticket public or private? Private tickets are only visible to the support staff and the client who created them.
- Status
Is this ticket published or unpublished? Unpublished tickets are only visible to support staff.
The Ticket Details are:
- Assigned To
Choose a user this ticket will be assigned to. The list of users shown here are those who have the Support Staff privilege either globally or for the specific category the ticket belongs in.
- Origin
Choose how the ticket was filed: web or email.
This is normally handled automatically. You may, however, want to manually use Email if you received a ticket through non–automated means (email to your personal address, instant message, etc) and want to indicate this ticket was not filed directly from the user.
- Time
The time spent on the ticket in decimal minutes.
- Created
The date and time the ticket was created.
- User
The user who owns the ticket.
This is usually the same as the user who submitted the ticket. The only time these differ is when a member of the support staff files a ticket on behalf of the user.
- Last Reply
The date and time the ticket was last replied to. You cannot change this field.
- Last Replying user
The user who last replied to the ticket. You cannot change this field.
The Conversation tab at the top of the page shows you the posts of the ticket.
Right below you will find two tabs.
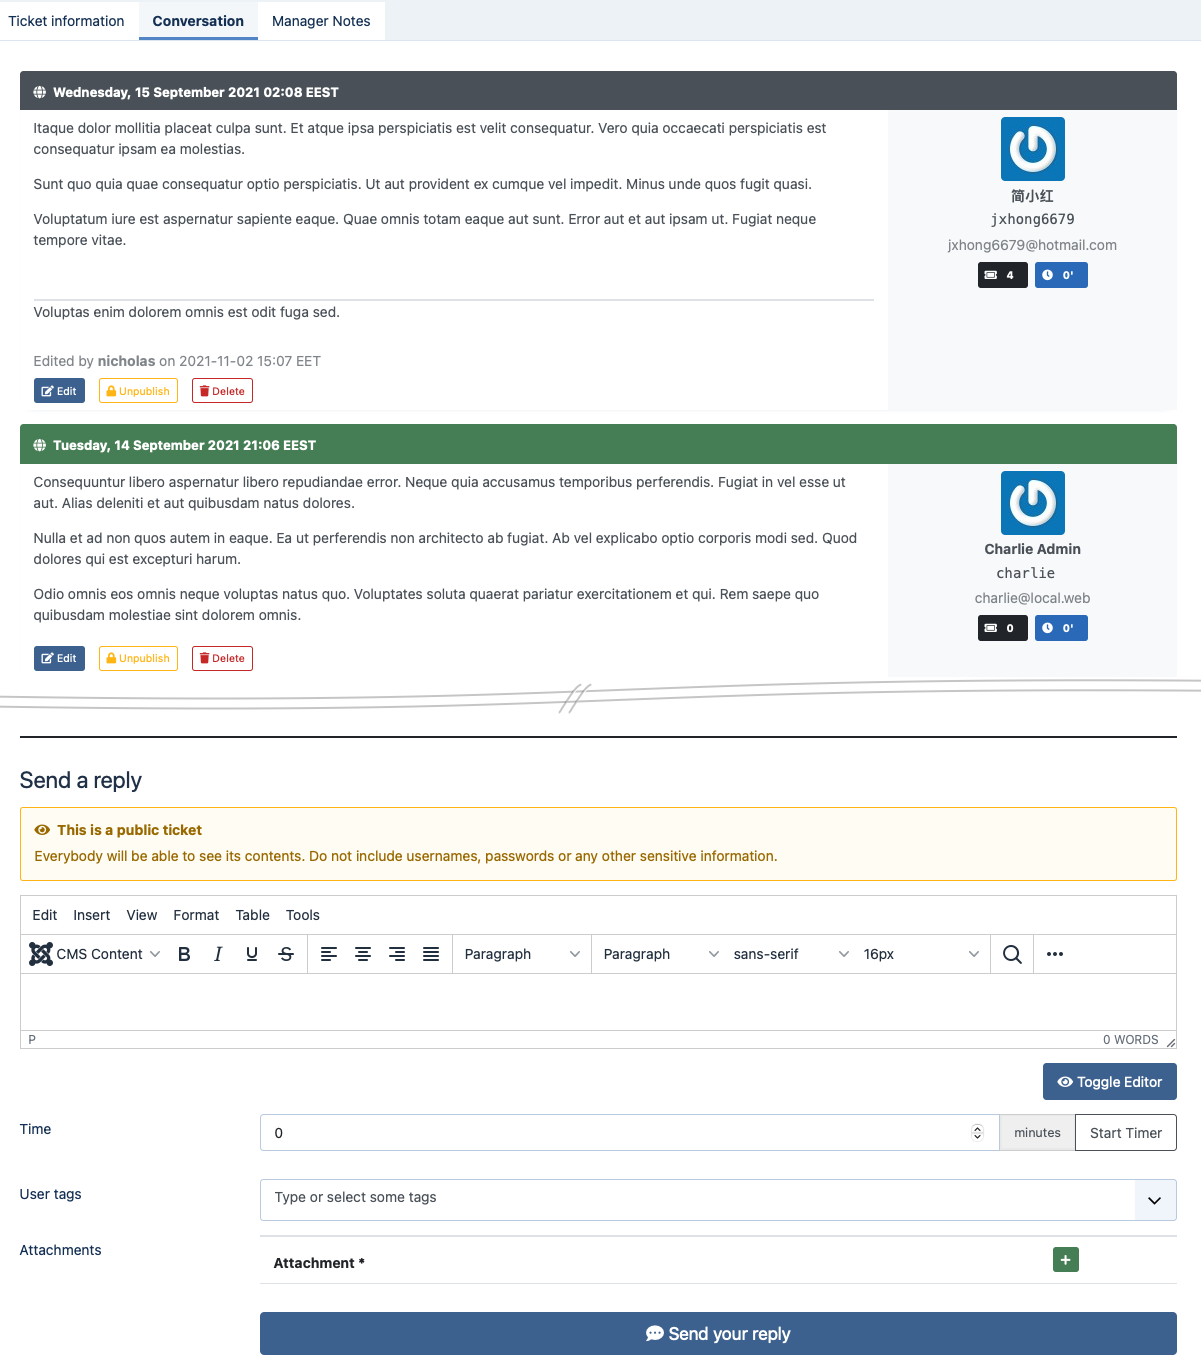 |
The Conversation tab contains the ticket thread which both you (the support staff) and the user see. Each post has some or all of the following buttons:
- Publish / Unpublish
Change the status of each post to published or unpublished. Unpublished posts are not seen in the front-end unless you are a member of the support staff. Members of the support staff and back-end users will see unpublished tickets with a big notice that the post is unpublished.
- Edit
Opens a post editor page where you can edit the text contained in the post. Very useful when a user accidentally publishes a password in a public ticket.
- Delete
Completely deletes the post.
Warning
Deleting a post is irreversible. Use with extreme caution. You should unpublish the post instead.
If you also have an attachment to your ticket you will see the following buttons next to it:
- Publish / Unpublish
Changes the published state of the attachment. Unpublished attachments are only visible to the support staff.
- Delete
Completely deletes an attachment (both the database record and the file on the disk)
Warning
Deleting an attachment is irreversible. Use with extreme caution. You should unpublish the attachment instead.
Below the conversation you will find the Post a reply area where you can enter a reply to the user and an optional attachment. Use the button below it to submit your reply (and send an email to the user, if the respective plugin is enabled).
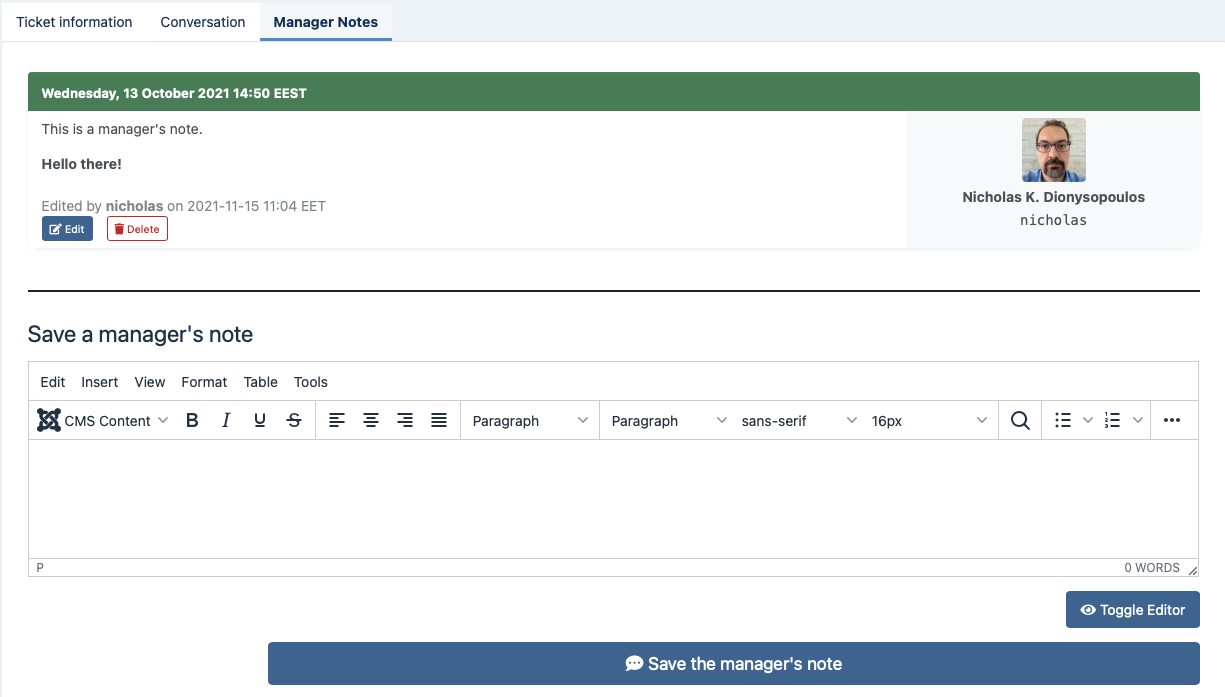 |
The other tab is called Manager Notes. Manager notes are internal communication between the support staff and can also double as private notes. Only support staff can see them. The users cannot see the manager notes.
They work just like the Conversation view with a few differences:
You can not post attachments to Manager Notes.
Manager Notes are only seen by the support staff, not the users.
Other support staff does not receive an email when you post a new Manager Note.